C4x4 Tow Hook Installation on a 1998 XJ
Writeup by Dale Majka
This write-up will cover the install of
Custom 4x4 Fabrication's Tow Hooks and Brackets for my 1998 XJ.
The idea behind this modification is because factory XJ's predominately did not
come with front tow points, mine included. There are other alternatives to tow
hooks (i.e. after market bumpers, winches, and front hitch receiver). I wanted
to keep the cost to a minimum, not have to install a new bumper, and keep my
factory skid plate. A hitch receiver does not allow the install of a front skid
plate.
C4x4 tow hook brackets are designed to add strength by sandwiching the frame
rail. If you want to see a picture of the brackets, click the C4x4 link above
and look on their Armor page. The directions that came with the package gave us
a general feeling of how the unit installed, but specifics were lacking. The
slight variations of XJ models, in my opinion, is the reason for this.
According to the manufacturer, no drilling is required for install, but possible
fabrication of the end caps is needed. In addition to the end caps we had to
grind a notch in the factory bumper brackets (this will be explained later).
None was necessary for the install of the tow hook brackets.
Work was completed in approximately 2.5 hours.
Parts:
(All parts and bolts were included in shipment)
2 L-Brackets
2 Frame Rail Brackets
2 Tow Hooks
Corresponding mounting hardware included
Tools:
Floor Jack
Jack Stands
Metric Socket Set with extensions
Metric Wrench Set
Bench Grinder
Dremmel Tool
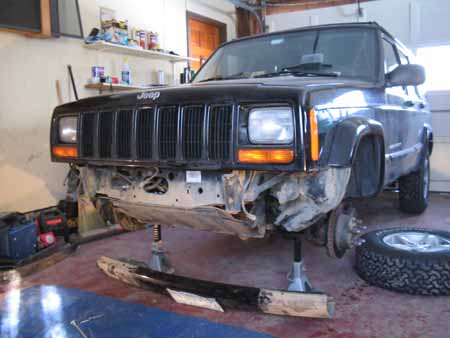
The first step was to put the XJ on jack stands and remove the front tires. This
step is not mandatory, but is highly recommended and gives you allot more room
to work. Secondly, remove the bumper end caps (unhook the fog lights), bumper,
bumper brackets, and front skid plate (if applicable). Remember to remove the
hose from the vacuum canister before removing the front bumper.
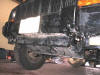
Picture: End caps and bumper are removed. Skid plate and factory bumper brackets
need to come off.
Install the L-Bracket on the inside of the unibody rail with the bolts, nuts and
washers provided. The back side is very tight and it takes a steady hand to
place the nuts on the bolts.
Picture: L-Bracket installed.
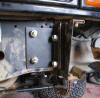
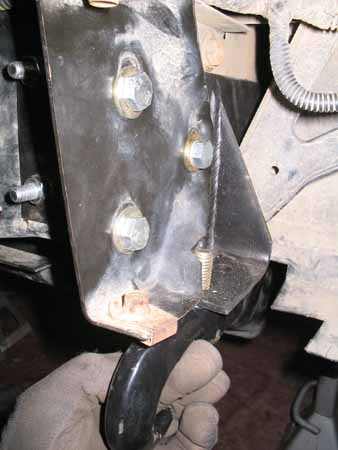
The longer frame rail bracket goes on the outside rail, and is sandwiched by the
factory bumper bracket (i.e. it goes on top of the frame rail bracket). Slightly
tighten the bolts; you'll need to take the whole thing apart in a moment.
Picture: Frame rail bracket installed with factory bumper bracket on top of it.
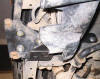
We had to cut a small notch on the factory bumper bracket in order for the tow
hook's forward bolt to fit properly. Mark the placement of the bolt and remove
the factory bumper bracket. Take it to the bench grinder and cut the notch.
Check for fit. Do this on both sides. If the front bolt fully inserts without
hitting the factory bumper bracket, tighten all of the bolts to gorilla
specifications. If not, cut the notch bigger. Congratulations if it fits without
grinding.
Picture: The factory bumper bracket has been notched.

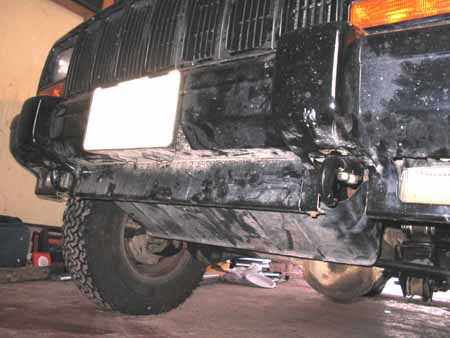
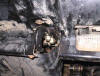
Re-install the bumper, then install the tow hooks (remember to hook the vacuum
hose up). The tow hooks utilize two bolts, washers and locking nuts. If you
followed the procedure listed above you should have no issues installing the
bolts for proper fit. We then re-installed the skid plate.
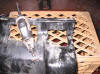
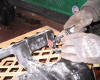
A portion of the skirt on the bumper end caps needs slight fabrication. We used
a Dremmel tool to cut a section out so the tow hooks would fit. You will be
unable to put a tow rope on the tow hooks if you do not cut the end caps. The
pictures tell the story.
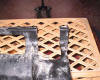
Pictures: Before, during and after shots of the end cap fabrication.
Due to normal wear and tear, I was missing a couple of bolts from the bumper
assembly. Steve had extras on hand from his old bumper, so we replaced what was
missing.
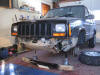
Finish the install by re-installing the bumper end caps, hooking up the fog
lights, putting the tires back on and removing the vehicle from the jack stands.
Finished product:
I've yet to test the tow hooks and actually hope not to have to use them, but I
have them if the time should come. I feel that they will be quite sufficient if
used properly.
Thank you Steve, a.k.a
ThePhantum for your help and the use of your garage.